Moodle has a new Activity/Resource called Checklist:
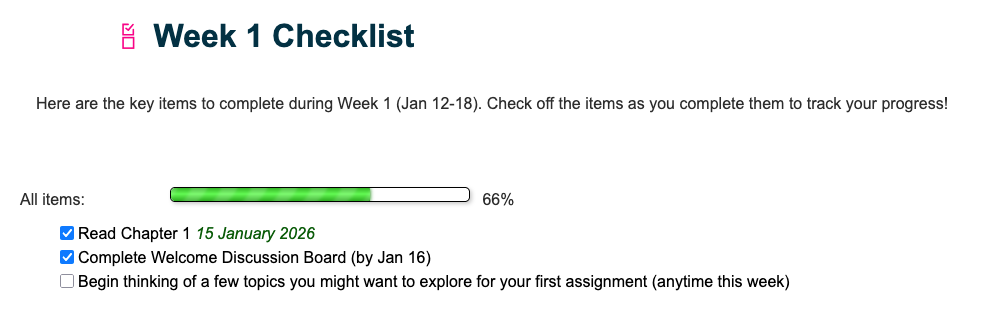
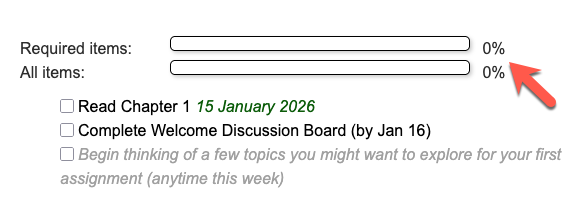
Using checklists in your course can be a helpful tool that provides students with structure, predictability, and transparency. This is what it appears like for the student:
Why use checklists in your classroom?
The following video (6 minutes) will describe what checklists are, why use them in your classroom, different ways to use them, and what to include in them.
Frequently Asked Questions
Either!
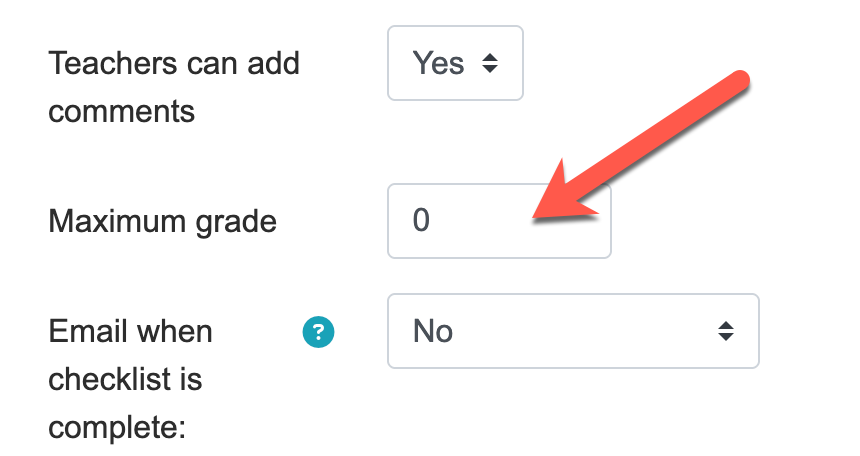
In the Settings, you can set the maximum grade to 0 so it won’t appear in the gradebook. Or, you can set it to your desired value so it can be automatically graded in the gradebook, based on what is checked off.
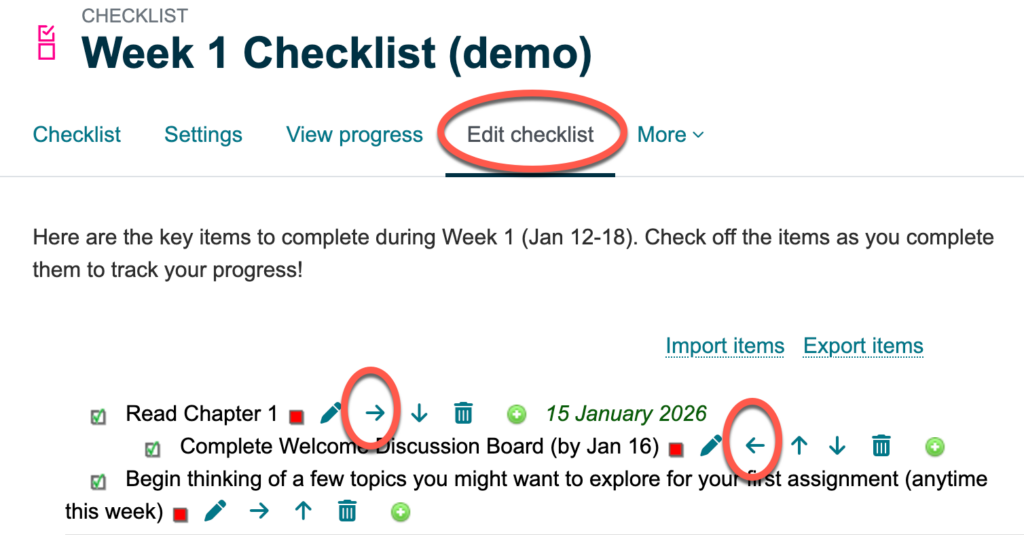
When you’re editing your checklist, you can click the left or right arrows to nest an item underneath an item. You can only nest items 1 level deep.
Optional Item
When you’re editing your checklist, click the little box before the title of your item.
The text will turn grey and italicize meaning it is now an optional item for students.

Then, students will now see two progress bars – one for required items and one for all items (the optional ones) to help differentiate the two.
Non-Checkable Item
When you’re editing your checklist, click the little box before the title of your item two times.
The text will turn bolded meaning it now appears as a non-checkable item for students.

Yes.
A) In the Settings, you can choose to include links to course activities/resources in your checklist for the current section or for the whole course. This will automatically add a list of all the resources and activities in that section/whole course.
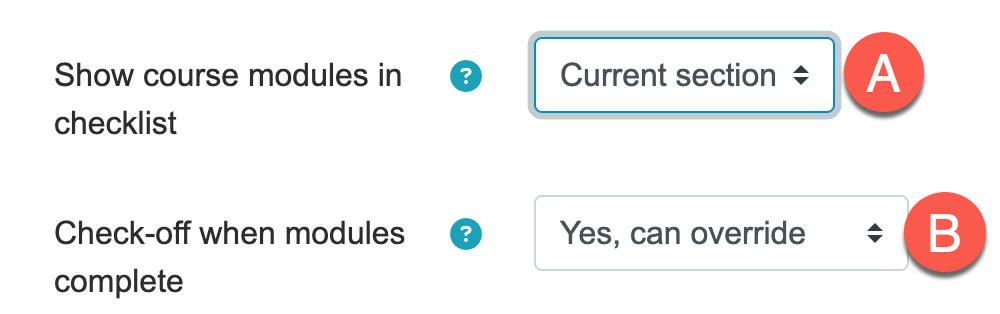
B) You can decide whether items can be automatically checked-off when activities/resources are complete in the course and whether or not this can be overridden.
Modifying Linked Course Resources/Activities
If you make updates to the activities in the course, when you edit your checklist, the list will automatically be updated with any changes made in the course.

When editing your checklist, you can hide items by clicking the ‘eye’ icon next to the name.
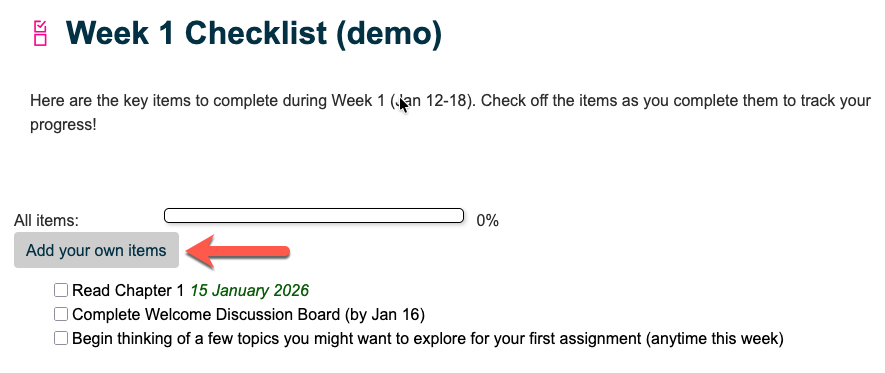
In the settings, if you set the “User can add their own items” to Yes, students will see a “add your own items” button in their checklist. The items they add to their checklist will only be visible to them.
In the settings, you can choose who can make updates to checklist items – student only, teacher only, or student and teacher.
- If student only is selected, only students can check off items on their checklist
- If teacher only is selected, teachers can manually check off items for students
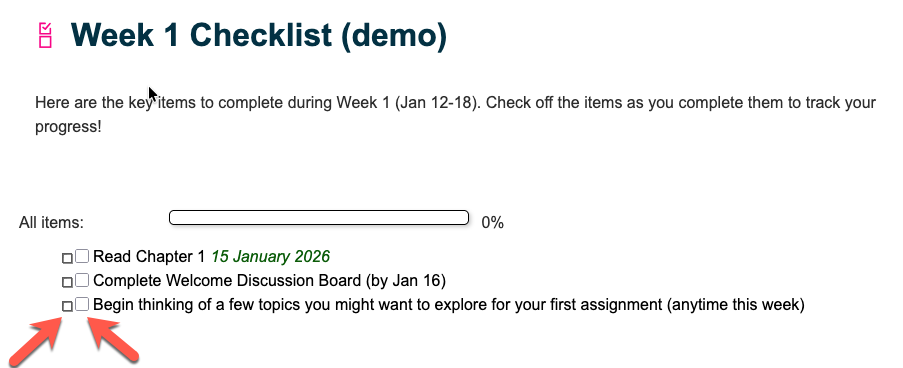
- If student and teacher is selected, then students can check off items and teachers can manually check off items too (the screenshot below showcases how students would see two checkboxes – one for themselves and one for the teacher)
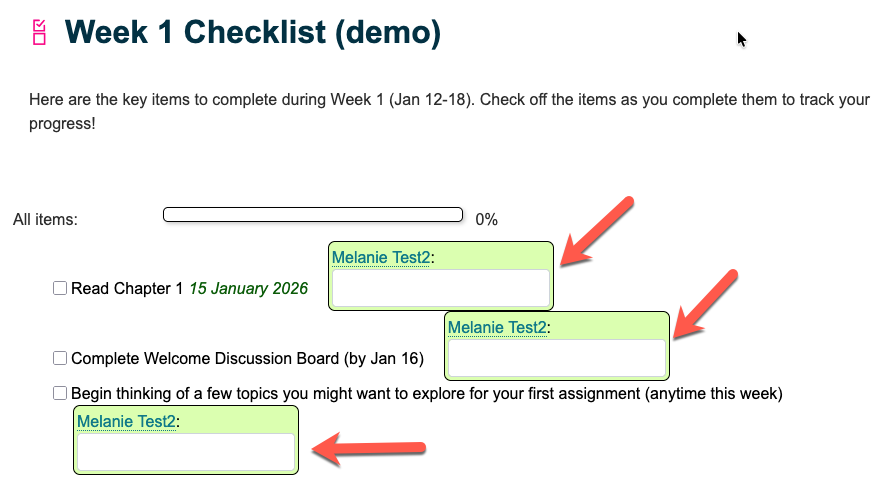
In the Settings, if the “Users can add their own comments to checklist items” is set to Yes, students can add their own personal notes to checklist items. These are not visible by the instructor.
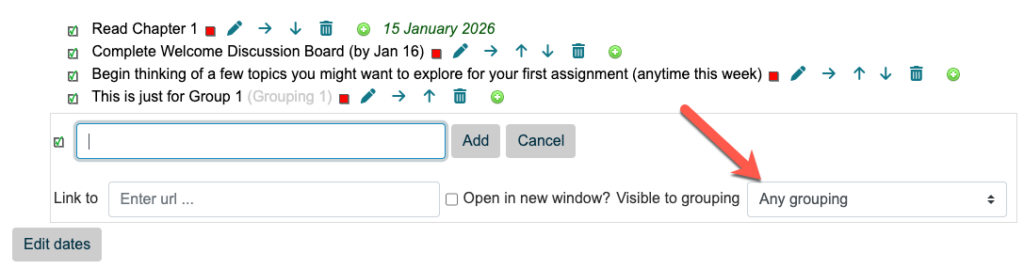
Yes! Group mode will need to be enabled in the Settings and groups and groupings will need to be made. Then, you will be able to select the desired group when creating checklist items:
Please note that it is not possible to create checklists that all group members can collaboratively check off. Checklist items are for individual students to check off.