Here’s a short overview of some of Moodle’s editing icons and how you can use them to to give your students the best learning experience!
Now that you are in your Moodle course, you may want to make changes and add content! In order to do so you first have to turn edit mode on. Turning the edit mode on allows you to make revisions to your course such as adding activities and resources, uploading files, deleting items, and moving or hiding sections or activities.
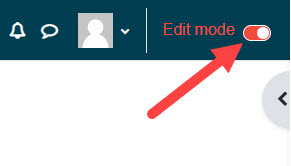
In the top right corner of your course, select the toggle button to the right of Edit mode. You will know you have successfully activated this when when it turns red.
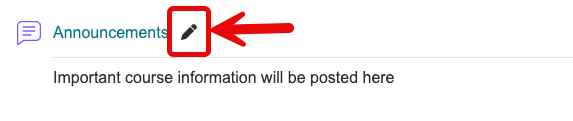
- Clicking the pencil icon lets you quickly edit the name of a course section or activity.
- Holding your mouse over a resource (highlighted blue), and clicking and holding lets you quickly move it by drag and drop.
- Clicking the three vertical black bullets allows you to edit the section or activity.
Cool Tip (1)
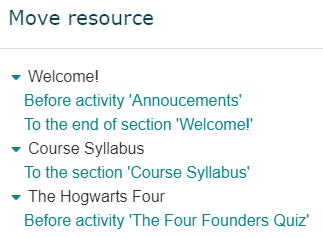
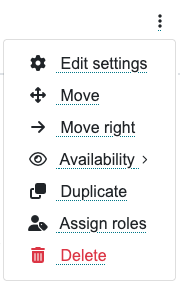
You can easily move activities in a very busy course. Just click the three vertical bullets in the right corner, then select Move from the dropdown (the crosshairs icon) – it will then display all the items and you simply click into where you want to move your activity.
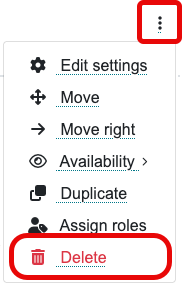
Each section or topic, activity and resource you add to your course will have its own Action menu. The main editing features for those added activities and resources are hidden in the action menu to make Moodle mobile friendly. To view the menu click the three vertical bullets. If you click the three vertical bullets to the right of a course section (weekly or topic) you can edit, highlight, hide or delete the topic. If you click the three bullets to the right of an activity or resource you can also duplicate, and assign roles to the item:
Cool Tip (2)
You don’t actually have to turn on edit mode to edit activities?
Try it by following these easy steps:
- Go to your course with the edit mode off.
- Click into an existing activity – for example a forum or assignment.
- You’ll see the Settings tab (At the top of the page, under the course name).
- Click it and it will display for you many useful editing options. Another time saver!
This menu is more detailed with lots of options that we invite you to explore. This menu allows you to do a lot more than the one at the course page including: backups, permissions, results and more.
We want to highlight that if you follow steps 1 and 2 above, and then select the More and Overrides from the drop-down, then this is where you can add user and group overrides to allow for different dates and times and even extra time for quizzes or assignments!
Frequently Asked Questions
An activity is a group of features in Moodle that students can contribute to directly such as a quiz, assignment or forum. A resource is an item that instructors can use to support learning such as a book, file, page or folder. You can add an activity or resource to anywhere in your Moodle course. A subsection acts as a container within a week or topic, like a nested accordion. Subsections helps to group related content and reduce scrolling.
In order to add a subsection or an activity or resource, ensure editing mode on in the course you are adding the item to.
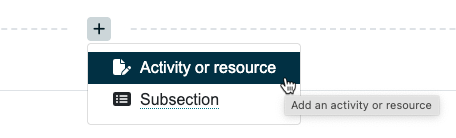
Then, go to the section where you would like to add an activity or resource hover over the dotted line where you want the item to go and click the + symbol, you will have the option to add an activity or resource and an option to add a subsection.
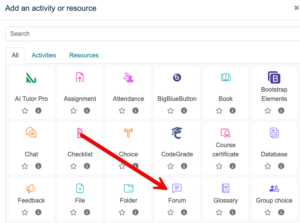
Below is an example of how to add a Forum!
- Go into your course (ensure editing mode is turned on) and find the section where you would like to add this forum.
- Hover over the dotted line, click the + symbol, and select Activity or resource.
- Find and select Forum, or type Forum in the search and then select it.
- Name your Forum, if needed make the appropriate settings changes, and click Save and return to course or Save and display at the bottom of the page.
Want a quicker way to add a file to your Moodle course, other than uploading it through the add an activity or resource link? Did you know you can just drag and drop files (pictures and documents) to your course?
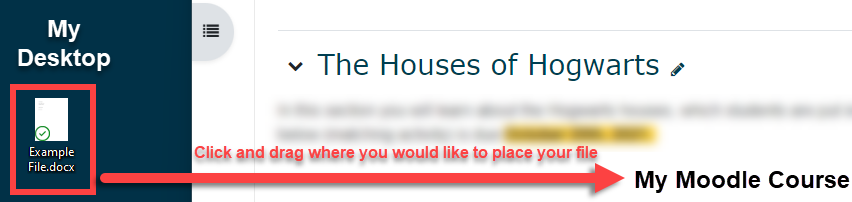
To do this, arrange your desktop so that you can view both your Moodle course and the files on your computer that you want to add, at the same time.
Make sure edit mode turned on, and then click and drag the files from your computer to drop them into the sections where you would like them placed in Moodle.
The file name in Moodle will remain the same as what you had it saved as on your desktop but, you can edit the file name by clicking the pencil next to the file or edit the files settings by selecting edit to the right of the file, then from the drop-down choosing Edit settings.
It is very simple to delete sections or items, to start, turn editing on within your course page. Next, find the item or section you want to delete. Finally click on the three vertical bullets to the right of this item, and from the drop-down select Delete and this item will now be removed from your course.
Please note
The item you deleted will be available for you to restore for seven days. If you change your mind or delete something by accident go to the course main page, select the More tab (under the course name) and select Recycle bin from the drop-down.
You can hide sections or items very easily in Moodle.
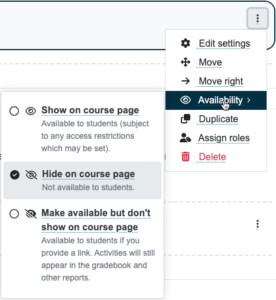
Go to your course page, turn editing on, and look for the section or item you wish to hide from students. Next, click on the three vertical bullets to the right of this item, and from the drop-down select Availability then Hide on course page If you choose Make available but don’t show on course page students will not have access to the item unless you link to it somewhere, if the item is a graded activity students will have access to it in their grader report.
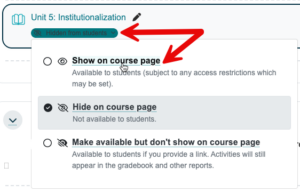
If done properly the item should now be greyed out and say Hidden from students with a teal background below it. To quickly show the item again click Hidden from students and select Show on course page.
By default every Moodle course comes with an Announcements forum and every student has a forced subscription. An announcement generates a post and an email to students, however students cannot reply back to these messages so it’s only a one way communication. If you would like your students to be able to reply back to you, please reach out to the LTI team and we can help you set this up.
Please be aware that once you make an announcement, by default the message will be sent 45 minutes after you post it.
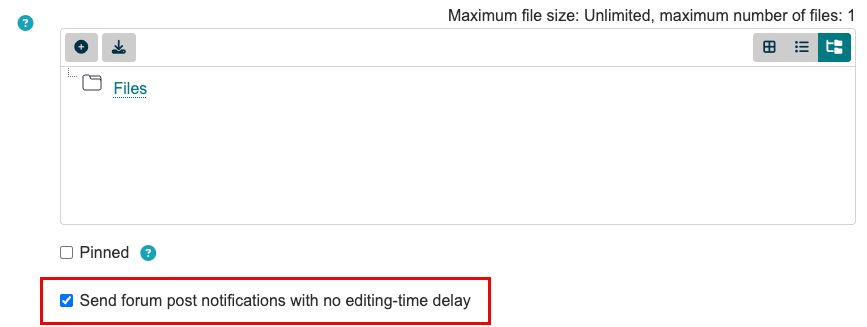
To send the announcement immediately, click the Advanced link below the announcements message.

You will notice this is also how you can add attachments and pin the post.
Check off the box next to where it says Send forum post notifications with no editing-time delay and click the Post to forum button.