After you have created a backup file of your course in Moodle, the need may arise to restore your course back into Moodle. Restoring a course is a similar process to creating a backup.
To restore your course:
- Go to the Moodle course where you would like to restore your content – this may be a current course that was automatically created for you or you can request a new blank course by filling out our online request form.
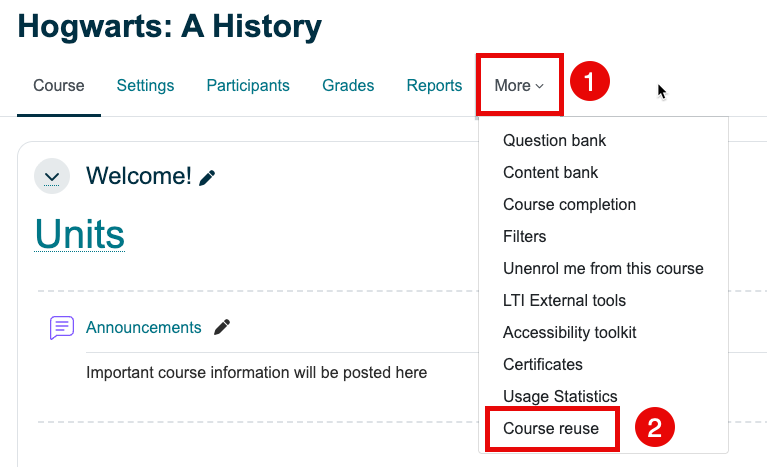
- Under the course title, select the More tab (1), and then “Course Reuse” (2).
- Select Restore from the left-hand menu.
- You will be prompted to select a backup file to be restored. If you have saved your backup file to your computer, you can upload your file or drag and drop it into the space provided (A). You may also find it listed under the user private backup area (B). Click the Restore button or link to proceed.

(A)

(B)
- Confirm the details of the backup and course settings. Select Continue.
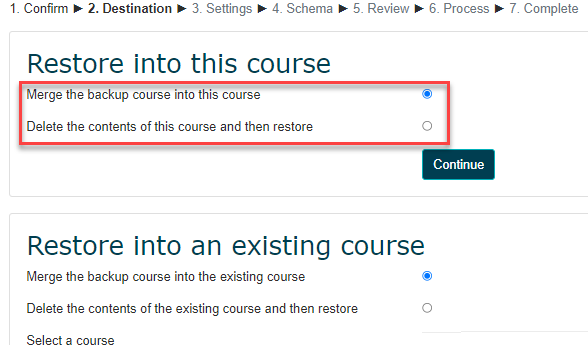
- Destination: You will then be prompted to select a destination for where your file is to be restored, either by restoring into the course you are currently in, or by searching for a course. We recommend restoring into the course you are already in. Choose to either merge the backup course into the existing course (i.e., the content will be added in addition to any content already included in the course) or to delete the contents of the course and then restore (i.e., replace any existing content with the content from your backup file). Be careful when making this selection!
- Settings: Next, you will be given the opportunity to configure what settings are to be included in your restored course.
- Schema: At this stage you can select/deselect specific items to be restored. Tip: if you are only wanting to restore some items, we recommend selecting “None” to deselect all items. You can then choose which specific items to include. Click the Next button.
- Review: Check that everything is configured as needed. When you are certain everything is in order, select the “Perform Restore” button.